Published November 9, 2026 · Checked by the editor against the listed sources
Before you start: This guide is general information, not medical advice. Check with your doctor or physiotherapist first if you have osteoporosis, recent surgery, a heart condition, dizziness, or pain. If you have had a recent fall, joint replacement, or surgery, check with your doctor or physiotherapist which of these moves suit you before starting. If you have a heart or lung condition, take medication affecting your heart rate, or experience dizziness, ask your doctor which activities suit you before starting. Stop and get help immediately if you feel sharp pain, chest pain, or faint.
Many people over 60 walk regularly but skip the strength and balance work that can help keep joints stable and reduce the risk of stumbles. I designed this 3-day weekly plan to combine aerobic fitness, muscle strengthening, and balance practice into short, manageable 25-minute sessions that fit easily into your routine.
Why Strength, Balance, and Walking All Matter
Public health guidelines from the CDC recommend that adults aged 65 and older aim for at least 150 minutes of moderate aerobic activity each week, along with muscle-strengthening activities on at least 2 days and balance practice.
The National Institute on Aging (NIA) says that three types of exercise can improve your health and physical ability, so it helps to include all of them.
To build up your walking minutes on off days, follow our Beginner Walking Plan for Seniors: A 4-Week Guide.
What You Need and Setup
-
Sturdy chair: Use an armless dining chair with a firm seat and no wheels.
-
Supportive counter or table: A sturdy kitchen counter or heavy table provides safe handholds for balance exercises.
-
Proper footwear: Wear flat, supportive, non-slip shoes on a clean floor.
-
Optional equipment: A light flat resistance band for upper body work (see our Resistance Band Exercises for Seniors).
-
Pace and breathing: Move slowly and with full control. Use the talk test: you should be able to speak in complete sentences throughout each move.
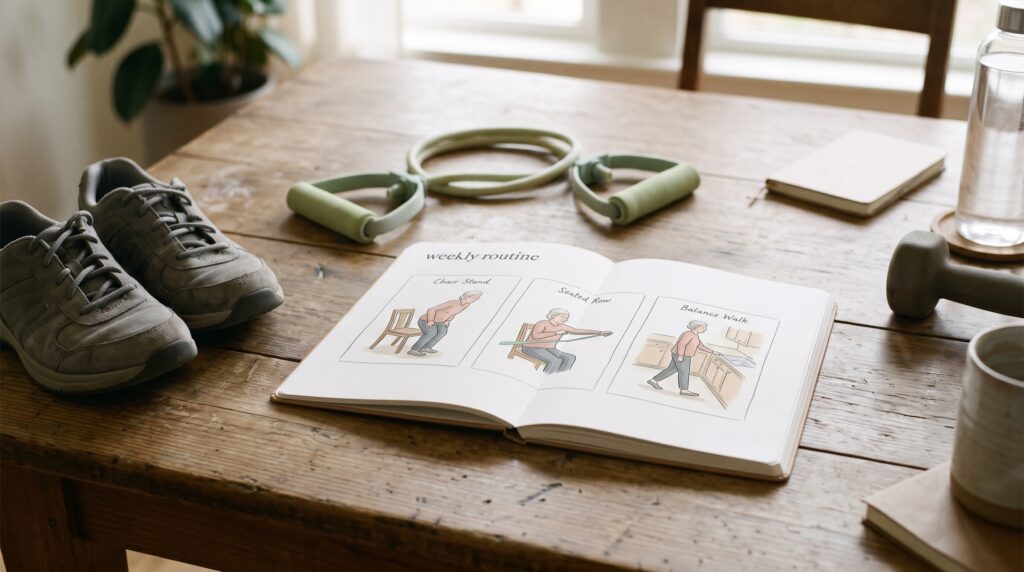
The Plan at a Glance
| Day | Primary Focus | Exercises Included | Session Time |
| Day 1 | Legs & Balance | Sit-to-stand, Heel raises, Single-leg stand | 25 minutes |
| Day 2 | Upper Body & Core | Band rows, Counter push-ups, Seated marching | 25 minutes |
| Day 3 | Balance & Mobility | Heel-to-toe walk, Side steps, Chair yoga breathing | 25 minutes |
Note: Spread these sessions across non-consecutive days (such as Monday, Wednesday, and Friday). The NIA advises avoiding working the same major muscle groups two days in a row to allow adequate muscle recovery.
Step-by-Step Exercise Routines
Day 1: Legs and Balance
Start with 3 minutes of easy marching on the spot to warm up.
-
-
Target muscles: Quadriceps (front thighs), glutes, and hamstrings. Strengthens legs for getting out of chairs and climbing stairs.
-
How to do it: Sit forward in your chair with feet flat and hip-width apart. Lean slightly forward from your hips, press firmly through your heels, and stand up completely. Pause, then slowly lower back down. For full details, see our sit-to-stand guide.
-
Coach’s cue: “Lean forward from your hips, press through your heels, and squeeze your buttocks as you stand.”
-
Reps/Sets: 8 repetitions, 2 sets.
-
Easier version: Place your hands on the chair armrests to assist as you push up.
-
Safety check: Keep your knees pointing in line with your second toe; avoid letting your knees collapse inward.
-
How it should feel: Clear effort in your thighs and seat without knee joint pain.
-
-
Standing Heel Raises
-
Target muscles: Calves (gastrocnemius and soleus) and ankle joints. Supports ankle stability and stepping confidence.
-
How to do it: Stand tall facing your counter with fingertips resting lightly on the surface. Slowly rise up onto the balls of your feet, holding for 1 second at the top, then lower your heels back down under control.
-
Coach’s cue: “Lift straight up toward the ceiling rather than leaning forward into the counter.”
-
Reps/Sets: 10 repetitions, 2 sets.
-
Easier version: Perform seated in a chair, pressing the balls of your feet into the floor to lift your heels.
-
Safety check: Keep your knees slightly soft; avoid locking your knees straight.
-
How it should feel: Working warmth in your calves and ankle joints.
-
-
Single-Leg Balance Stand
-
Target muscles: Gluteus medius (outer hips) and deep ankle stabilizers. Improves single-leg balance for walking.
-
How to do it: Stand tall facing your counter with fingertips resting lightly on the surface. Shift your weight onto your left foot and lift your right foot an inch off the floor. Hold for 10 seconds, lower, and switch sides. For more balance progressions, see our single-leg balance guide.
-
Coach’s cue: “Stand tall through your standing leg and look straight ahead at eye level.”
-
Reps/Sets: 10-second hold per side, 3 repetitions per leg.
-
Easier version: Keep the big toe of your lifted foot lightly touching the floor for kickstand support.
-
Safety check: Keep your fingertips resting lightly on the counter so you can grip firmly if you feel a wobble.
-
How it should feel: Mild effort in your standing ankle and outer hip.
-
Day 2: Upper Body and Core
Start with 3 minutes of shoulder rolls and easy arm sweeps to warm up.
-
Seated Band Row
-
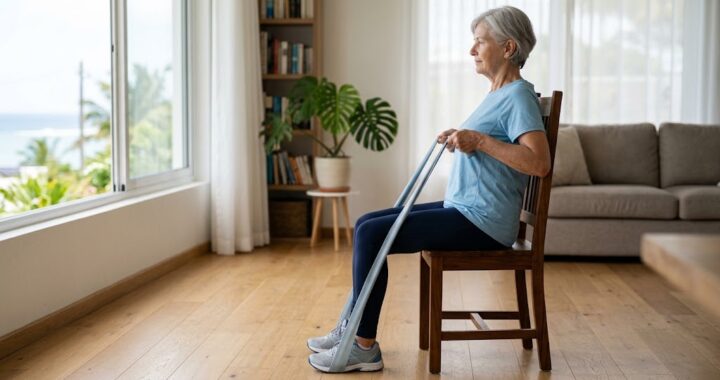
Target muscles: Rhomboids, middle trapezius (upper back), and biceps. Improves posture and counteracts slumping.
-
How to do it: Sit forward in your chair. Loop the band under the arches of both feet with heels flat on the floor. Hold the band ends, pull your elbows straight back along your sides, squeeze your shoulder blades, and return slowly.
-
Coach’s cue: “Drive your elbows backward and imagine squeezing a walnut between your shoulder blades.”
-
Reps/Sets: 10 repetitions, 2 sets.
-
Easier version: Perform the movement without a resistance band, focusing entirely on the shoulder blade squeeze.
-
Safety check: Keep the band below chin height and ensure it is secured firmly under your shoes so it cannot slip.
-
How it should feel: Working effort across your upper back and between your shoulder blades.
-
-
Counter Push-Ups
-
Target muscles: Chest (pectoralis), front shoulders, and core flexors. Strengthens arms and chest for pushing tasks.
-
How to do it: Stand facing a sturdy kitchen counter, placing your hands slightly wider than shoulder-width apart on the edge. Step your feet back until your body forms a straight line. Slowly bend your elbows to lower your chest toward the counter, then push back up smoothly.
-
Coach’s cue: “Keep your body in one straight line from head to heels; exhale as you push away from the counter.”
-
Reps/Sets: 6 to 8 repetitions, 2 sets.
-
Easier version: Stand closer to a wall and perform wall push-ups with a smaller tilt.
-
Safety check: Ensure your hands are placed on a dry, non-slip counter edge and your feet are on a firm floor.
-
How it should feel: Controlled effort across your chest, arms, and stomach muscles.
-
-
Seated Marching
-
Target muscles: Deep core flexors and hip flexors. Elevates heart rate and improves trunk stability while seated.
-
How to do it: Sit upright near the front of your chair with feet flat. Alternate lifting your knees upward 2 to 3 inches while swinging your arms naturally.
-
Coach’s cue: “Sit tall like a string is lifting your chest, and lift each knee without leaning back into the chair.”
-
Reps/Sets: 20 total steps (10 per leg), 2 sets.
-
Easier version: Lift your feet only an inch off the floor, or keep your hands resting on your thighs.
-
Safety check: Maintain an upright spine; do not slump backward into the chair rest.
-
How it should feel: Light warmth in your thighs and core muscles with steady breathing.
-
Day 3: Balance and Mobility
Start with 3 minutes of slow side-to-side weight shifts to warm up.
-
Heel-to-Toe Tandem Walk
-
Target muscles: Ankle stabilizers, foot arch flexors, and core alignment. Sharpens narrow-base balance.
-
How to do it: Stand beside a long counter, resting your inside hand lightly on the edge. Place your right foot directly in front of your left foot so your right heel touches your left toes. Take 10 deliberate steps forward in a straight line, turn slowly, and walk back.
-
Coach’s cue: “Look forward at a fixed spot on the wall rather than down at your feet.”
-
Reps/Sets: 3 passes of 10 steps.
-
Easier version: Leave a 2-to-3-inch gap between your front heel and back toes (a staggered stance).
-
Safety check: Keep your fingertips resting lightly on the counter so you can grip firmly if you feel a wobble.
-
How it should feel: Active work in your feet and ankles as your body makes small balance corrections.
-
-
Gentle Side Steps
-
Target muscles: Gluteus medius (outer hips) and thigh flexors. Supports lateral stability for stepping around obstacles.
-
How to do it: Stand facing your counter, resting both hands lightly on the surface. Take a small, deliberate step to the right, bring your left foot to meet it, then step back to the left.
-
Coach’s cue: “Keep your toes pointing straight ahead and land softly on your feet.”
-
Reps/Sets: 10 steps in each direction, 2 sets.
-
Easier version: Do gentle seated side-taps, tapping one foot out to the side and returning to center.
-
Safety check: Keep your steps small and deliberate; do not cross one foot over the other.
-
How it should feel: Mild effort along the sides of your hips and thighs.
-
-
Seated Chair Yoga Stretch and Breathing
-
Target muscles: Chest, spine rotators, and breathing muscles of the diaphragm. Releases joint tension and settles breathing.
-
How to do it: Sit tall in your chair. Inhale slowly through your nose as you gently sweep your arms out to the sides. Exhale slowly through your mouth as you lower your arms and round your upper back slightly. Finish with 2 minutes of quiet, deep breathing. For full gentle stretch routines, see our Chair Yoga for Seniors guide.
-
Coach’s cue: “Breathe in comfortably to fill your chest, and let your shoulders melt down as you exhale.”
-
Reps/Sets: 8 minutes total of slow movement and breathing.
-
Easier version: Keep your arms resting on your lap and focus entirely on smooth breathing.
-
Safety check: Move only within a pain-free range; do not force any joint stretch.
-
How it should feel: Relaxing, centering, and loosening across your upper body.
-
Coach’s Tips
Here is how I guide clients in sessions to structure their weekly training safely:
Essential Form Cues
-
Control the lowering phase: Take 2 to 3 seconds to lower yourself down in the sit-to-stand, heel raise, and push-up.
-
Keep hands light: Rest your fingertips lightly on the counter so your legs do the work, but keep hand support close.
-
Breathe continuously: Never hold your breath. Exhale during effort (like pushing or standing up) and inhale as you reset.
Common Mistakes and Fixes
-
Mistake: Rushing through repetitions using momentum instead of muscle control.
-
Fix: Count “1-2” on the way up and “1-2-3” on the way down for every movement.
-
-
Mistake: Gripping the counter edge tightly with white knuckles.
-
Fix: Rest your fingertips lightly on the counter and let your legs do the work. Only lift your hands off the support after several weeks, and only if the move feels steady.
-
-
Mistake: Trying to change weights, holds, and reps all at once when progressing.
-
Fix: Change only one variable at a time. Increase reps first before adding resistance or reducing hand support.
-
How to Progress
With new clients, the mistake I see most often is trying to do too much in week one and ending up sore or discouraged. I advise staying at the baseline level for 2 full weeks before making any changes. When a movement feels easy and you complete all sets with clean form, progress gradually:
-
Add 1 additional set: For example, move from 2 sets to 3 sets on standing or seated moves.
-
Increase hold time: Add 2 seconds to your balance holds.
-
Lighten hand support: Move from two-hand counter support to a lighter fingertip touch.
-
Keep progression single-variable: Never alter more than one variable in the same week.
Quick Answers
Do I need to complete all three workout days? Aim for all three days for full-body benefits. If your schedule only permits two days, prioritize Day 1 (Legs & Balance) and Day 2 (Upper Body & Core), and practice quick 10-second single-leg balance stands while waiting at the kitchen counter on other days.
Can I do these sessions on days I go for a walk? Yes. You can complete your session before or after your walk, or space them across separate times of day. If you feel tired, shorten the routine rather than skipping it entirely.
How long before I notice an improvement in my daily mobility? This varies from person to person. Keep a simple weekly note on how your sit-to-stand feels so you can see small improvements.
Warning Signs: When to Stop and When to See a Doctor
Stop exercising and seek emergency medical attention immediately (call your local emergency number) if you notice:
-
Chest pain, tightness, or pressure.
-
Pain spreading to your jaw, neck, back, or left arm.
-
Sudden severe shortness of breath.
-
Dizziness, lightheadedness, or feeling faint.
-
Sudden weakness, face drooping, or trouble speaking.
Book a visit with your doctor or physiotherapist if you notice:
-
Joint pain that lasts into the next day.
-
Joint swelling that gets worse after practice.
-
Unsteadiness or a persistent fear of falling that does not go away.
Sources
Medical disclaimer: This article is for general information and education only. It is not medical advice and does not replace advice from your doctor or physiotherapist. Stop any exercise and seek medical help if you feel chest pain, dizziness, sharp pain or unusual shortness of breath.
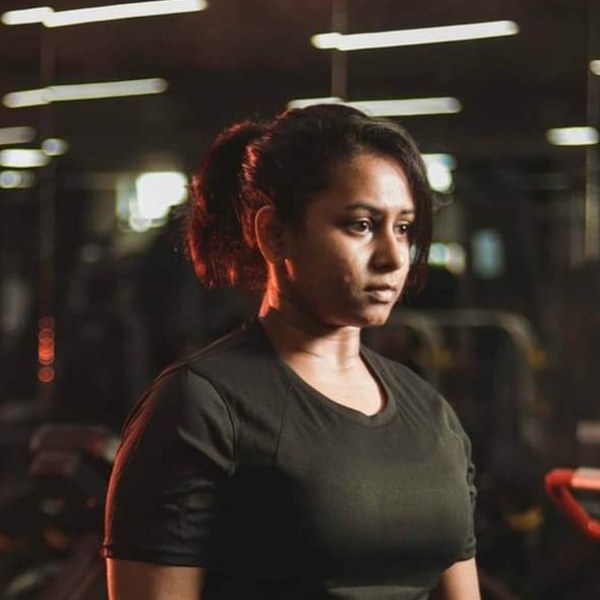
Bhavna Goheeram — Personal Trainer and PE Teacher in Training
ISSA Elite Trainer (2023) | WABBA Level 1 Personal Trainer (2022) | SAGF Gymnastics Leader (2017)
Bhavna Goheeram is a personal trainer who holds an ISSA Elite Trainer certification and is studying to become a PE teacher. She writes and reviews the Fitness Marble guides, checking each exercise for safe, practical technique and each claim against public CDC, WHO and NHS guidance.